Monthly Archives: December 2020

Share your Smartphone internet – Bluetooth

I decided to invest in a Bluetooth dongle to help me access the internet on my desktop etc via my smartphone. Why, I think is more secure in being less visible than a Wifi connection.

After having a look around I decided to go for the Plugable USB-bt4le from amazon. This is because it claimed be run on Linux. You can read the review here

And it did! However I had an issue when connecting on an unlocked smartphone that was on the Orange network. This forced me to dig into the world of Android development . It was a baptism of fire. 🙂 I spent and entire day and most of the night learning about Android’s adb (android debug bridge) and the android development environment.

Thanks to Canonical who maintain the software packages for Ubuntu, it is easy to install adb using the apt install adb command in Terminal.

Plagable bluetooth 4.0 on Ubumtu 18.04, Canonical, debian,

After digging around on the internet I found that tethering was set to use DUN and to disable this you had to run

sudo adb shell in Terminal

followed by the statement below after you enter shell in

shell@E####:/ $ settings put global tether_dun_required 0

I think removing the APN for the DUN setting from the mobile phone carrier (on the Orange network in my case) also helped as it seemed to re-enable DUN on reboot.

shell@E####:/ $ settings delete global tether_dun_apn=[ApnSettingV3]Orange Internet,orange.fr,,,orange,orange,,,,,208,01,0,DUN,,,true,0,,,,,,,spn,Orange F

Then reboot.

This did not solve the tethering problem entirely although it prevented the DUN (Dail-up Network)lookup on trying to connect.

What really got it working - Solution to Bluetooth tethering the Smartphone running Android 6.0.1

On your Android Smartphone Go to Settings

Turn on Bluetooth first (ensure you also have an internet connection although this can be done later ). Then

Settings → More → Tethering and Portable Hotspot

then Enable Bluetooth tethering.

And this should work! Unfortunately it seems you have to do this each time you turn Bluetooth on.

Credits:

phpMyAdmin on Ubuntu 18.04

I had phpMyAdmin version 4.6 something running on php 7.2.24 on Ubuntu 18.04 linux.

I checked the version I had by running the following command in Terminal : apt show phpmyadmin

Package: phpmyadmin
Version: 4:4.6.6-5ubuntu0.5
Priority: extra
Section: universe/web
Origin: Ubuntu
Maintainer: Ubuntu Developers <ubuntu-devel-discuss@lists.ubuntu.com>
Original-Maintainer: Thijs Kinkhorst <thijs@debian.org>
Bugs: https://bugs.launchpad.net/ubuntu/+filebug
Installed-Size: 25.0 MB

I uninstalled the older version of phpMyAdmin via Terminal and running :

sudo apt remove phpmyadmin

These were originally installed from the Debian repository using Terminal and command line when I setup LAMP .

Do not use the autoremove command if you want the current version of php left in place. I also left the old phpMyAdmin database in place. Because I was not sure if it was needed by the new version.

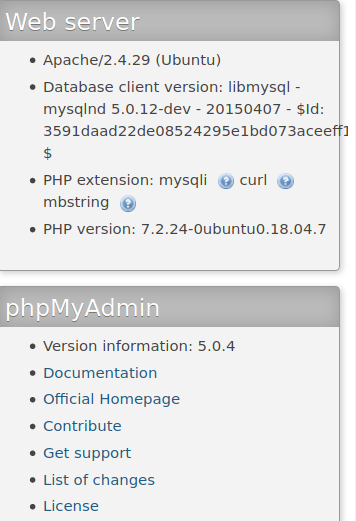
My current php and phpMYAdmin versions are as shown in the image below

phpMyAdmin error - Warning in ./libraries/sql.lib.php#613

You can refer to this article here. phpMyAdmin never worked properly. When accessing tables in databases I got the following type error.

Warning in ./libraries/sql.lib.php#613

count(): Parameter must be an array or an object that implements Countable etc….

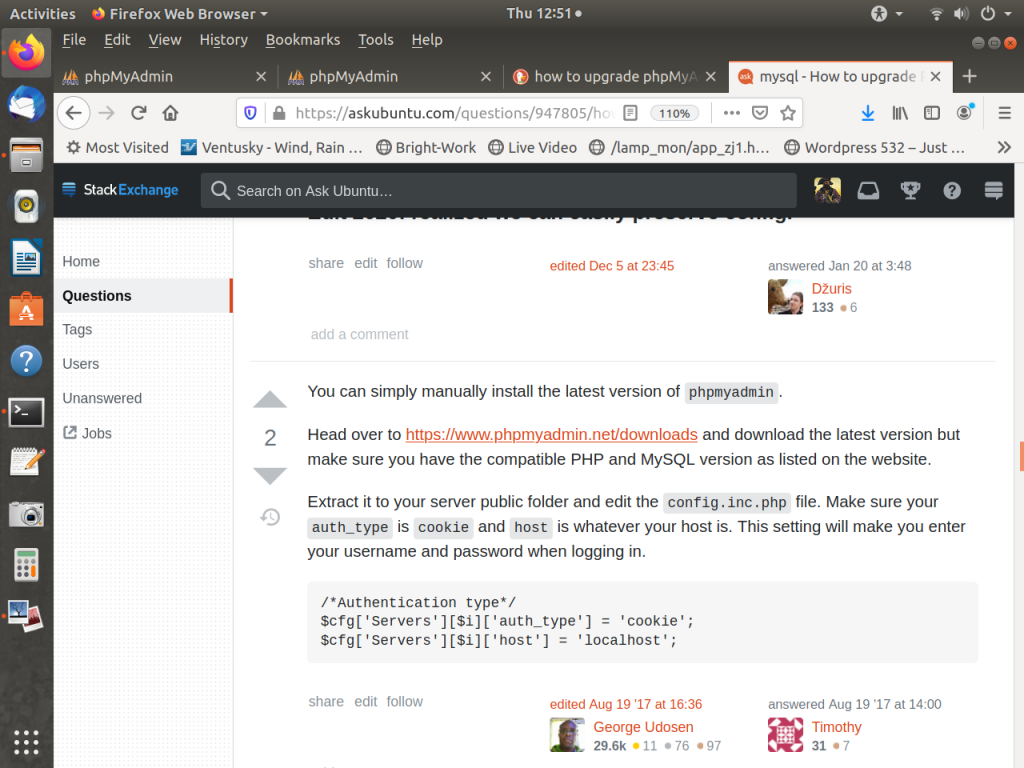
After looking at various articles the best solution I think is the one I found at AskUbuntu.com . See the image below.

How to get rid of phpMyAdmin error - Warning in ./libraries/sql.lib.php#613

It is simple and very effective. And exemplifies the portability of phpMyAdmin. The other methods of removing the installed version of phpMyAdmin and installing a newer version look painful and are not guaranteed as the Debian repository may not have the latest version or version compatible with your current Php version.

Method:

  • Go to the phpMyAdmin website. Download the latest version in zip format (5.0.4 at the time of writing). Copy the hash number as well. This will enable you to verify the integrity of the downloaded file.
  • Verify the hash number. To do this, open Terminal, supply the path where the zip file has been downloaded and type sha256sum filename.zip . Verify the hash number is the same as that supplied by the phpMyAdmin download site. See image below.
  • Unzip the file.
  • Copy the unzipped folder and all it’s contents to your public folder. On Ubuntu 18.04 running Apache 2.4.29 this is in ‘/var/html’ . You can renamed to folder to something shorter if you like.
  • Make a copy of config.sample.inc.php and rename it to config.inc.php.
  • Edit config.inc.php

Make sure you have the authentication part setup correctly as follows to use a cookie and your web server is correctly specified in host.

/* Authentication type */

$cfg['Servers'][$i]['auth_type'] = 'cookie';

/* Server parameters */

$cfg['Servers'][$i]['host'] = 'localhost';

$cfg['Servers'][$i]['compress'] = false;

$cfg['Servers'][$i]['AllowNoPassword'] = false;

  • Save config.inc.php
  • Launch phpMyAdmin by accessing the phpMyAdmin hosted folder.
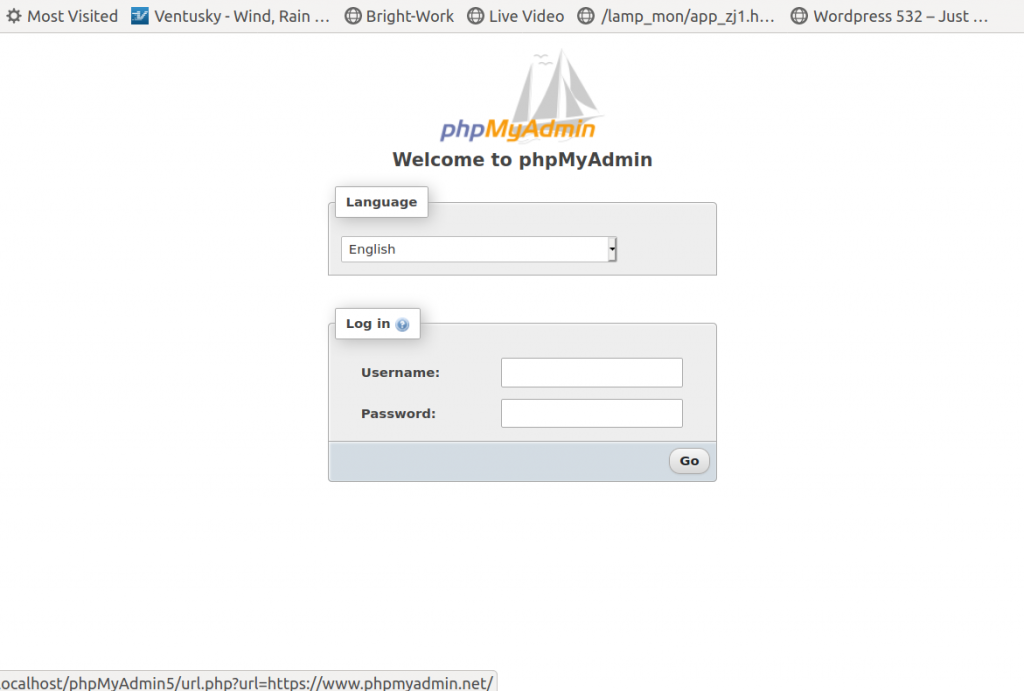
  • In my case https://localhost/phpMyAdmin5/ You should get the phpMyAdmin login screen. See image below.

All done! 🙂

Spell Check not working in LibreOffice on Ubuntu 18.04

This even though the hunspell dictionary seems to been installed in LibreOffice.

The solution is to open Terminal and

 sudo apt install hunspell-en-gb

Credits

Thanks to @timothy at AskUbuntu.com for the phpMyAdmin solution.

Thanks to TrisquelUser on https://ask.libreoffice.org/en/question/78558/spell-check-not-working/

for the LibreOffice Spell Checker fix.