- Introduction
- Accessing your encrypted data
- Automating the mount process
- Notes on Automation
- Creating an encrypted folder on a USB drive
- Source Reference
Introduction
eCryptfs is a POSIX-compliant enterprise cryptographic "stacked" filesystem for Linux. Please note that eCryptfs is not a partition/ disk encryption subsystem like "Veracrypt".
eCryptfs is a stacked filesystem that can be mounted on any directory and on top of the main file system.
Using eCryptfs, we can easily create an encrypted directory to store confidential data and mount it on any directory. Although it is good practice for the mount path to match the path of the underlying file system.
No separate partition or pre-allocated space is actually required. eCryptfs should work well on local filesystems such as EXT3, EXT4, XFS, JFS and ReiserFS etc.
eCryptfs also supports networked filesystems such as NFS, CIFS, Samba and WebDAV, but not does not have full functionality as it was designed to work with local filesystems.
It stores the cryptographic metadata in the headers of files, so the encrypted data can be easily moved between different users and even systems. eCryptfs has been included in Linux Kernel since version 2.6.19.
Installation
I have only tested it on Ubuntu 18.04 which runs on the 5.4.0-87-generic kernel obtained by running
$ uname -r
5.4.0-87-generic
To enable an utilize Ecryptfs install ecryptfs-utils
$ sudo apt install ecryptfs-utils
How to use Ecryptfs
The method below explains how to encrypt a folder called temp2 located at /home/zephyr/temp2
Open terminal and run the following:
$ sudo mount -t ecryptfs /home/zephyr/temp2 /home/zephyr/temp2
Passphrase: â enter your passphrase
Select cipher:
1) aes: blocksize = 16; min keysize = 16; max keysize = 32
2) blowfish: blocksize = 8; min keysize = 16; max keysize = 56
3) des3_ede: blocksize = 8; min keysize = 24; max keysize = 24
4) twofish: blocksize = 16; min keysize = 16; max keysize = 32
5) cast6: blocksize = 16; min keysize = 16; max keysize = 32
6) cast5: blocksize = 8; min keysize = 5; max keysize = 16
Selection [aes]: 1 â selected
Select key bytes:
1) 16
2) 32
3) 24
Selection [16]: 1 â selected
Enable plaintext passthrough (y/n) [n]: n â selected
Enable filename encryption (y/n) [n]: n â selected
Attempting to mount with the following options:
ecryptfs_unlink_sigs
ecryptfs_key_bytes=16
ecryptfs_cipher=aes
ecryptfs_sig=015fa84ce5a1043d
Mounted eCryptfs
temp2 is now and encrypted folder. Any files and folders moved into it or created in it, will be automatically encrypted.
It is very important to remember your passphrase to be able to access your eCryptfs encrypted files and folders. It is also advisable to make note of your encryption settings for future mounting/access of your encrypted file/directory. Choose a password of 14 characters long made up of 3 random words. This is easier to remember and still secure. You can add symbols and numbers to it increase the strength of the passphrase.
A signature file named "sig-cache.txt" will be created under "/root/.ecryptfs/" directory. This file is used to identify the mount passphrase in the kernel keyring. It is a read only file except for the root user. I suggest saving a copy with a .bak extension as the signature number for each encrypted and mounted folder. It is a good reference to have.
Accessing your encrypted data.
Each time you reboot your system the encrypted volume will be dismounted and you will not be able to access your encrypted data.
To access your data you have to remount the encrypted volume with:
$ sudo mount -t ecryptfs /home/zephyr/temp2 /home/zephyr/temp2
After which Terminal pops up prompting you for your passphrase
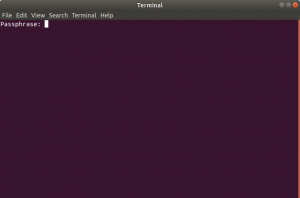
The problem with this is that you have to enter all the encryption options each time.
Automating the mount process
My solution to this is make an executable .sh file with a text editor. I use the default, gnome, gedit text editor
In this example, I have called it mount_temp2.sh
Paste the following code into it. Use whatever options you chose when you encrypted the file/folder.
#!/bin/bash $ sudo mount -t ecryptfs -o ecryptfs_cipher=aes,ecryptfs_key_bytes=16,ecryptfs_passthrough=no,ecryptfs_enable_filename_crypto=no /home/zephyr/temp2 /home/zephyr/temp2
Save mount_temp2.sh
Right click, on the file in File Manager, go to the Permissions tab and tick the box âAllow executing file as a programâ
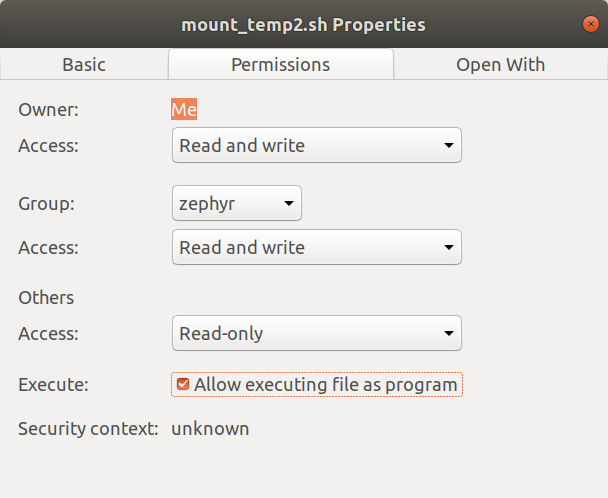
Next with your Text Editor, create a new executable file.
Call it run_mount_temp2.sh for example.
Paste the following code into it.
#!/bin/bash #start terminal and mount encrypted temp2 folder gnome- terminal -- sh -c './mount_temp2.sh'
Make it executable as described previously. Now when you start your system, simply double click on
run_mount_temp2.sh
this it will call Terminal and prompt you to enter your passphrase. After entering the correct passphrase you will be granted full access to your encrypted folder and files within.
Automating the dismount process
You can dismount (unmount) your encrypted folder at any time to make it inaccessible. By default
to unmount an encrypted drive manually, open Terminal an run
sudo umount /path/to encrypted/folder
so, in my test case it is
sudo umount /home/zephyr/temp2
To Automate unmount/dismount:
Create an executable file (refer to âAutomating the mount processâ for the steps) called
unmount_temp2.sh and in it enter the following code. Paths and folders should match your own.
#!/bin/bash sudo umount /home/zephyr/Documents echo "Dismounting Documents folder.."; sleep 5;
Next create the run file that will open Terminal and run the previous created executable.
Create an executable file called run_unmount_temp2.sh
Enter the following code into it:
#!/bin/bash #start terminal and unmount encrypted temp2 folder gnome-terminal -- sh -c './unmount_temp2.sh'
Double clicking on run_unmount_temp2.sh will run Terminal and execute the command to unmount the encrypted folder
Notes on Automation
All the automation files should be in the same folder/directory
The folder/directory containing the automation files should not be encrypted.
Creating an encrypted folder on a USB drive
On your Linux machine format a USB stick with ext4 file system. The USB stick will only be accessible to machines with Linux operating systems.
In this example I have given the USB stick a Volume Label called âSECRETâ.
Whenever you plug in this USB stick it will be mounted as âSECRETâ by the operating system.
Next create a folder on âSECRETâ. I called mine temp3.
Next mount and encrypt the temp3 folder by running the following command in Terminal. The path name should start with media/home directory name/usb volume name on a standard Ubuntu 18.04 install.
$ sudo mount -t ecryptfs /media/zephyr/SECRET/temp3 /media/zephyr/SECRET/temp3
The steps to automate are the same as described earlier on.
Note: Verify the volume name for the usb that you use in your scripts is correct and matches the one shown in Terminal when you type df .
In Conclusion
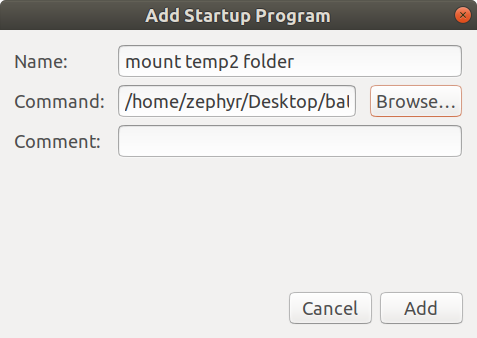
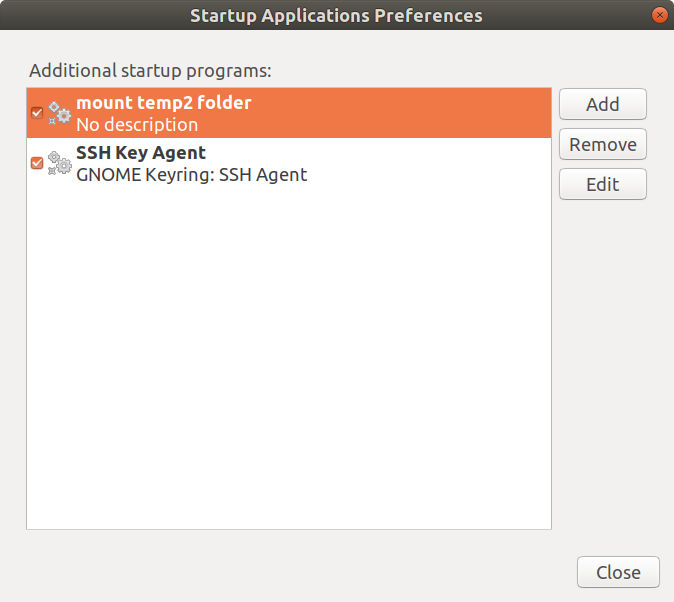
To further automate the mount process you could utilize the Startup Applications Preferences app
which comes pre-installed on Ubuntu 18.04 . This allows configuring applications to run automatically when logging in to your desktop. So just add the run_mount_temp2.sh example to the list of startup apps.
In the Command: field you need to enter bash U% followed by the path to your .sh executable.
bash %U /path/to/file/run_mount_temp2.sh
Alternatively you can create a .desktop file in /home/your home directory/.config/autostart . So for example mount_documents.desktop with the following code in it.
[Desktop Entry]
Type=Application
Exec= bash %U /home/zephyr/Desktop/batch/ecryptfs_batch/ecryptfs_mount_Documents.sh
Terminal=true
Hidden=false NoDisplay=false X-GNOME-Autostart-enabled=true Name[en_GB]=mount-documents.desktop Comment[en_GB]="mount encrypted Documents"
One quirk I noticed is that ecryptfs will allow you to carry on mounting your encrypted volume with an incorrect passphrase and proceed to create a new signature for it but you wonât be able to access your encrypted files and folders. Ecryptfs does warn you first that the passphrase you have entered maybe be incorrect and do you want to proceed with the mount. Best to abort if you are unsure about the passphrase you entered.
All in all , I think ecryptfs is a robust , fast and very flexible file encryption system.
 English
  Portuguese


