Monthly Archives: May 2020

May and roll on Summer!

I have been recovering from the Covid-19 virus this month and been taking it easy.

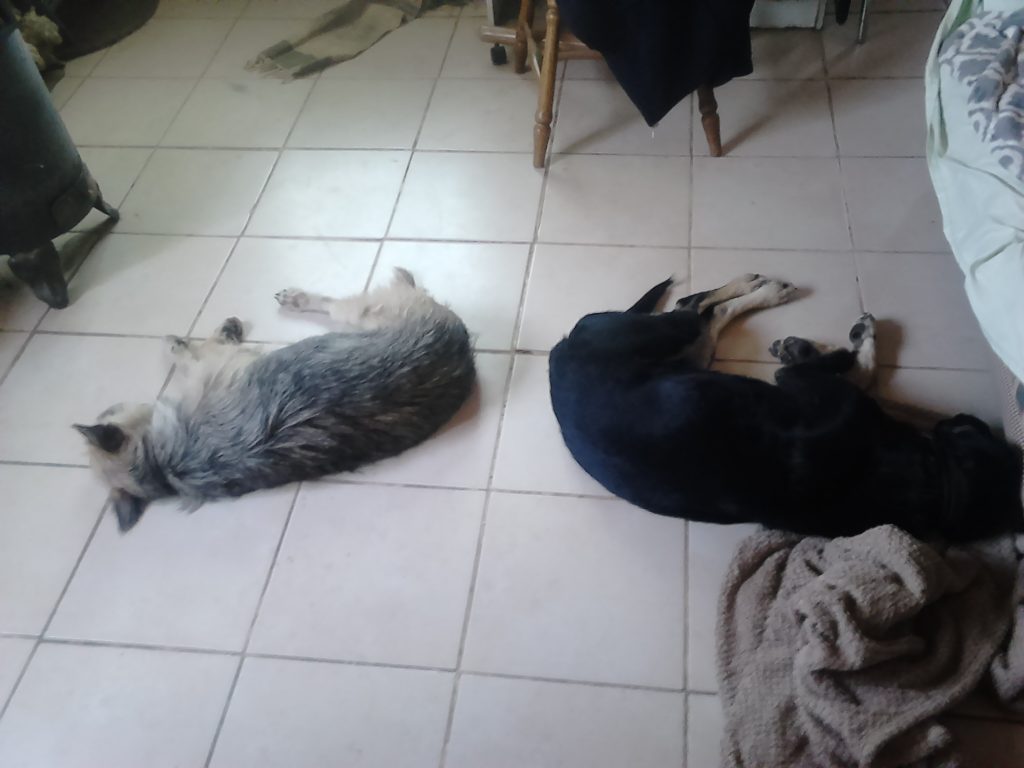
This week I have been making an effort to clear grass and weeds that have regrown. We are required by law to do this by the end of this month to help reduce the risk of fires. Summer is definitely here with inside temperatures of about 27Âşc max. Here the dogs Bonji and PG are cooling down inside.

To help me I have been using some light machinery. I don’t have a tractor and don’t really need one now.

I use a strimmer to get to the difficult places and to cut over the irrigation pipes.

Been using this battery operated 36V Black and Decker strimmer quite a bit all over the property.

Black+Decker 36V battery operated strimmer ,  England

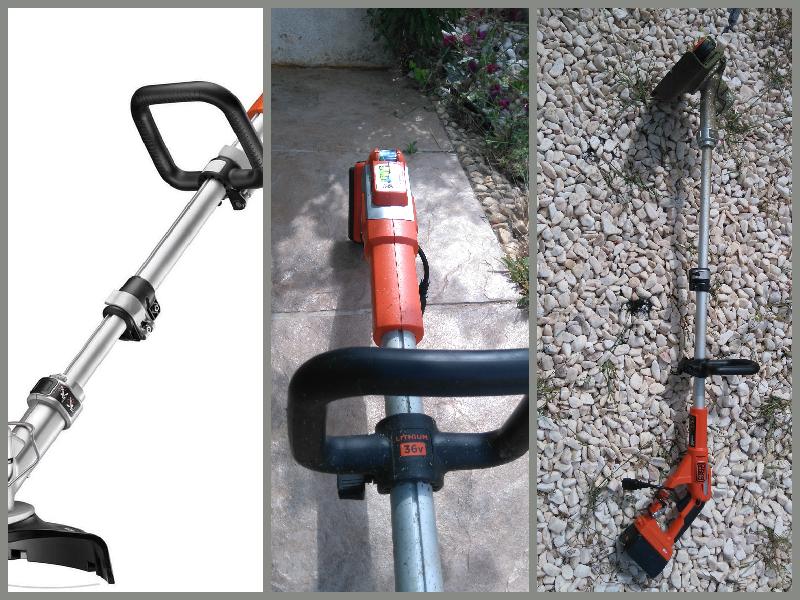
It cuts really well for what it is. It has 2Ah battery and runs for about 20 mins at full tilt. I really need another spare battery. The motor’s power is quite minuscule. It’s not rated. But if it runs for 20 mins.

Then (20mins/60 mins) x 2Ah = 0.667 Amps Hence the power of the motor is given by I Amps x V volts 0.667Amps x36 Volts= 24 Watts .

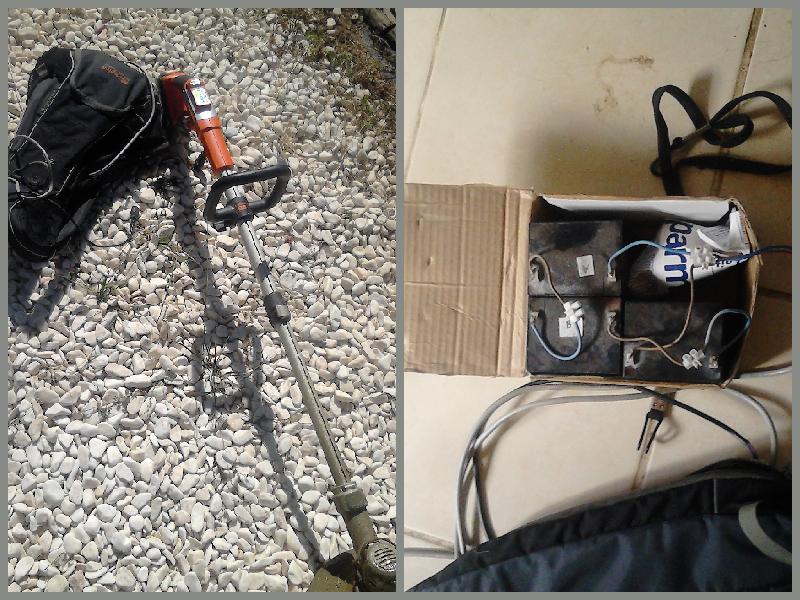
I am quite shocked. I am surprised at how small the motor is in terms of power has because it does an outstanding job! It cuts through some tough weeds. I changed the standard 1.5mm gauge line to 2.4 mm. It doesn’t auto feed with this but helps me cut through the thicker weeds. I bought it on amazon.co.uk who shipped it over. I bought the battery separately and modified so that I can use an external battery pack if I need to. I tried 12V 2.5 Ah lead acid batteries x3. Still quite heavy on your back at around 6kg. The machine Black and Decker Model GLC3630LB-XJ weighs just 3 Kg (with the lithium ion battery ) and is a delight to use.

Correction: Those lead acid batteries are 5Ah and weigh 5.4kg on your back. I had to press them into service today after the lithium ion battery charger gave up the ghost. 6/062020

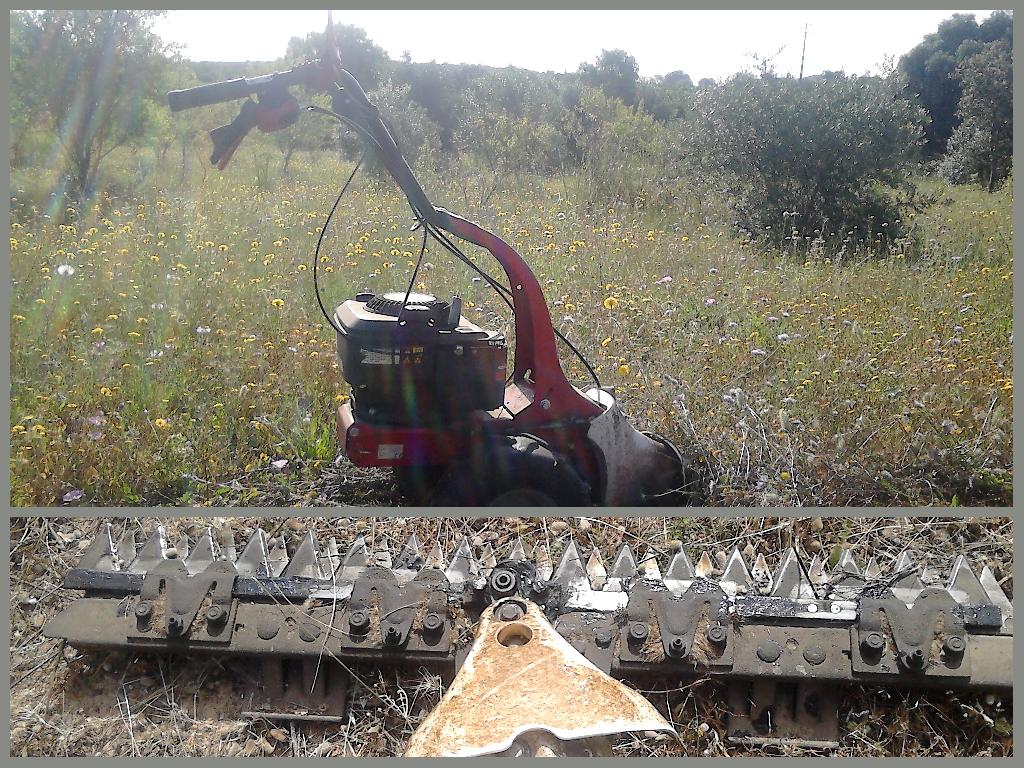
The real work horse has been the Italian made BNF 502, motorized scythe. The american built Briggs and Stratton 190cc petrol engine. It now takes me about 8 hours to clear my property with it. Look at the teeth. 🙂 I grease and oil the blade before making a run. Shame to have had to cut all those wild flowers.

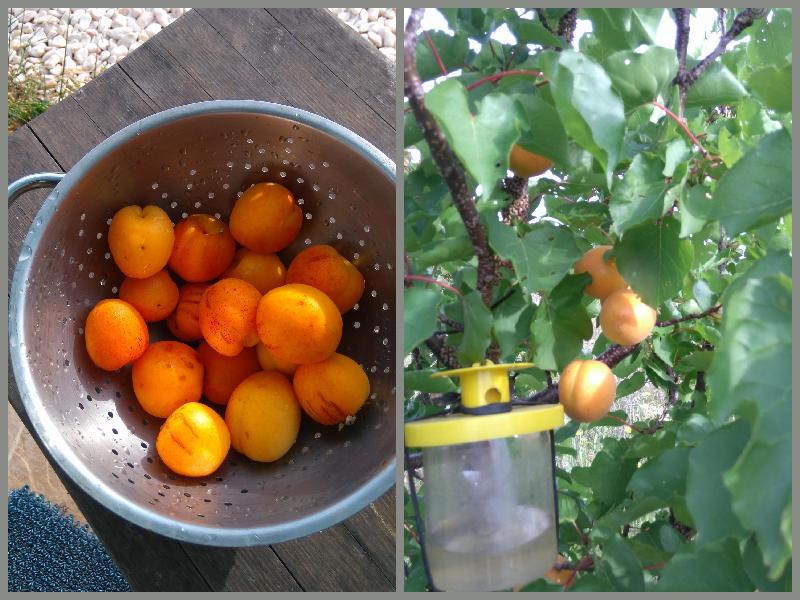
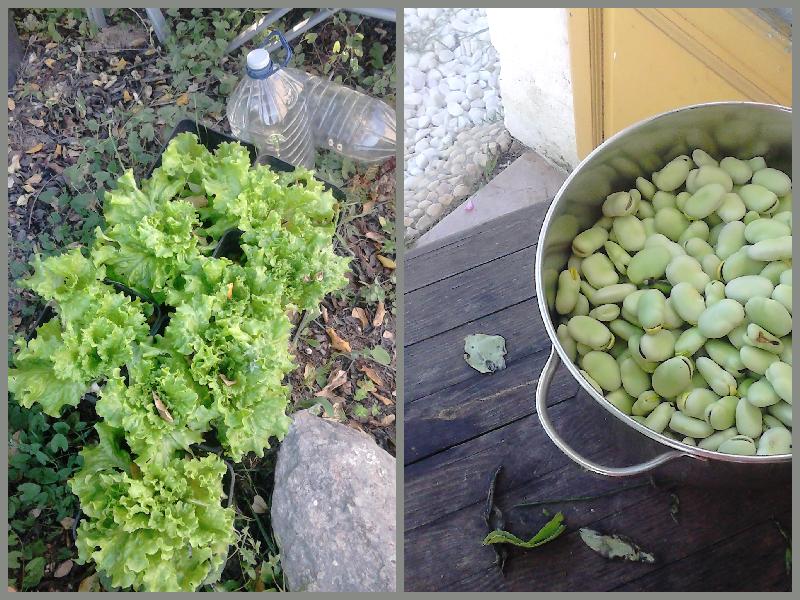
On the growing front. Harvested the fava beans this month. I get a handful of Physalis peruviana (Cape gooseberry) berries every other day. And now I have some sun ripened apricots which are very good. No worms so far.

Still growing my lettuce in pots which as you see works well for me. I need to plant another batch soon.

alface, favas, Belmonte, Luz de Tavira, Algarve

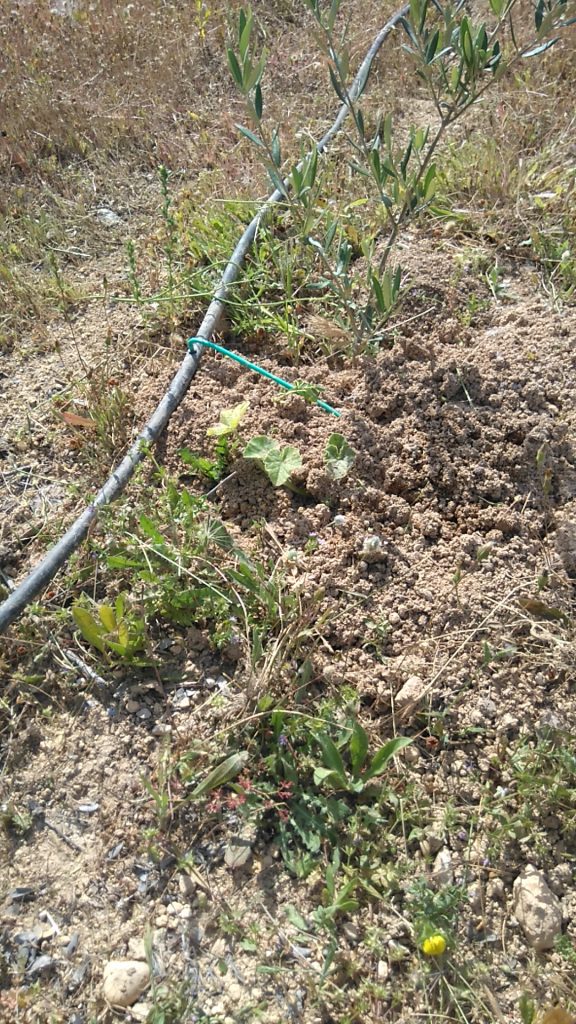
The irrigation pipe to the young olives on the western border was a good investment. It saves me and didn’t cost the earth. I have palnted a few pumpkins next to thes young olive trees. We have to see how then get on.

olive, olive oil , Belmonte, Algarve

That’s all for now! Thanks for reading!

Moving a live WordPress site to a local LAMP Server

Linux, Apache, MySql, WordPress, Web Development, Algarve, Portugal
LAMP on Ubuntu 18.04

Audience: Ubuntu Desktop and Server users. Tested on 18.04

Steps to follow to setup a local development WordPress installation.

1) Copy your entire live WordPress directory to your local LAMP server.

Do this by means of FTP using and FTP Client such as Filezilla.

This should include your wp-admin, wp-includes , wp-admin and all the files in the root directory in which these reside. This is where the wp-config.php, wp-login.php, .htaccess files etc reside.

2) On your LAMP server these should be placed in the directory. It is advisable to create a folder under the html directory where these files will go if you are hosting more than one test site. e.g var/www/html/testsite

3) Backup the MySql database related to your WordPress live site. It is easiest to do this using PHPMyAdmin provided by your control panel of your hosting site. This is the only way have done it so far. Accept defaults and export the database. You will be given the option to save the file as a *.sql file.

Ubuntu 18.04, WordPress, Stack Exchange, Ask Ubuntu, Algarve, Portugal

4) On your LAMP server create a MySql database and database user. You can use PHPMyAdmin. However I have had problems, with PHPMyAdmin throwing up errors and not importing the database correctly or granting user privileges correctly. I have had to do it via command line like this. I strongly advise this method, as command line rules. 🙂

By command line.

Log into mysql as root

Create database

mysql> create database db_name;

Import the database:

mysql> use db_name;

mysql> source backup-file.sql;

Create a user and grant privileges

GRANT ALL PRIVILEGES ON mydb.sql TO myuser@localhost IDENTIFIED BY "mypassword";

5) Edit your WordPress wp-config.php ensuring that the database name, username and user password match the ones created.

6) Update your tables to ensure your links work but running the following 3 command line MySql queries on the following tables. You can do this by logging into mysql as root via command line.

UPDATE wp_options SET option_value = replace(option_value, 'https://www.example.com', 'https://localhost/test-site') WHERE option_name = 'home' OR option_name = 'siteurl';

UPDATE wp_posts SET post_content = replace(post_content, 'https://www.example.com', 'https://localhost/test-site');

UPDATE wp_postmeta SET meta_value = replace(meta_value,'https://www.example.com','https://localhost/test-site');

These queries will replace references to your live site’s URL from database with the localhost URL.

7) Lastly, an mostly importantly this pertains to the Ubuntu operating system environment. Apache here is installed differently from a native install for security reasons. In order to get your development WordPress running, you must do the following otherwise none of the symlinks ( symbolic links) to other pages on your site will work.

Note: nano is a text editor that’s pre-installed on Ubuntu

  1. In /etc/apache2/apache2.conf, edit AllowOverride None for /var/www/ to AllowOverride All
  2. To edit use

sudo nano /etc/apache2/apache2.conf

Press CTRL + W and search for “<Directory /var/www/>”

Change here AllowOverride None to AllowOverride All

Save file and exit. (Press CTRL + X, press Y and then press ENTER)

  1. Type in the following command to enable mod_rewrite for .htaccess

sudo a2enmod rewrite

  1. Restart your apache server:

sudo service apache2 restart

Finally make sure you have a .htaccess file in the root directory where WordPress is installed.

It should contain code similar to this:

# BEGIN WordPress

<IfModule mod_rewrite.c>

RewriteEngine On

RewriteBase /your_directory/

RewriteRule ^index\.php$ - [L]

RewriteCond %{REQUEST_FILENAME} !-f

RewriteCond %{REQUEST_FILENAME} !-d

RewriteRule . /your_directory index.php [L]

</IfModule>

# END WordPress

That’s about it for now! Coming soon, a Control Panel App for a local LAMP install.

Sources:

Credits to: https://wordpress.stackexchange.com/users/84055/avinash (April,2020)

Credits to: https://www.wpbeginner.com, Editorial Staff at WPBeginner led by Syed Balkhi. (April,2020)

LAMP on Ubuntu 18.04

I took the leap and migrated to linux, ditching MS Windows 7 as my main operating system.

On the whole I am very pleased with Ubuntu 18.04.

I was running XAMPP on Windows 7 as test environment for hosting WordPress and PHP based applications.

So I needed to install a similar test environment on Ubuntu 18.04 desktop. In the Linux world this is LAMP. The components of LAMP are Linux, Apache Web Server, MySQL Server and PHP

Here is how to install LAMP on Ubuntu 18.04

Using command line via Terminal (press Control+Alt+T ) Terminal  Ubuntu 18.04

Install Mysql.

  • Ensure you have an internet connection then open Terminal.
  • Type sudo apt install mysql-server

Press Enter on the keyboard. This will install the Mysql Metapackage from the Debian repositories.

Test your Mysql server installation by typing mysql in the terminal window. You used be able to login with your Ubuntu user login password.

Install Apache 2

To install Apache you must install the Metapackage apache2 from the Debian repositories. This can by

  • Ensure you have an internet connection then open Terminal.
  • Type sudo apt install apache2

Install PHP

  • Ensure you have an internet connection then open Terminal.
  • sudo apt install php-pear php-fpm php-dev php-zip php-curl php-xmlrpc php-gd php-mysql php-mbstring
  • Your server should restart Apache automatically after the installation of both MySQL and PHP. If it doesn't, execute this command.

Check Apache

You should see the following page with a message saying that it work

Apache Web Server running

Check PHP

  • You can check your PHP by executing any PHP file from within /var/www/.
  • Alternatively you can execute the following command, which will make PHP run the code without the need for creating a file . $ php -r 'echo "Your PHP installation is working\n";'

Pat yourself on the back and take a break. Congratulations! You have just successfully installed a LAMP server on Apache.

As a reward install and play Chromium BSU.

  • Ensure you have an internet connection then open Terminal.
  • Type sudo apt install chromium-bsu

This should download and install this excellent arcade game which you can play for 5 minutes to have a break :). I tried downloading it from the Ubuntu Snap store but it didn’t install correctly from there. Chromium B.S.U Debian, Ubuntu 18.04

Preparing LAMP to run as a local WordPress and Web Hosting Test Environment.

Ubuntu installs Apache in modules and splits the configuration files which is different from the standard install.

The Mysql server installs with the Ubuntu user as root for authentication. WordPress and other applications use native mysql authentication.

Here is how to enable native root user authentication and change the mysql root user password.

  • Stop mysql:
  • $ sudo service mysql stop
  • (Be sure to stop the current server before performing the steps. Only one server can run at a time.)
  • $ sudo mkdir /var/run/mysqld; sudo chown mysql /var/run/mysqld
  • $ sudo mysqld_safe –skip-grant-tables&
You should see sonething like this if it runs successfully

[1] 1901

*@*-desktop:~$ 2020-04-29T20:36:42.126862Z mysqld_safe Logging to syslog.

2020-04-29T20:36:42.132327Z mysqld_safe Logging to '/var/log/mysql/error.log'.

  • 2020-04-29T20:36:42.197722Z mysqld_safe Starting mysqld daemon with databases from /var/lib/mysql
  • Next run $ sudo mysql --user=root mysql
  • This will log you in as the native mysql root user.

“Welcome to the MySQL monitor. Commands end with ; or \g.

Your MySQL connection id is 2

Server version: 5.7.29-0ubuntu0.18.04.1 (Ubuntu)..”

and you should have the mysql prompt mysql>

  • to change the root pasword run

mysql> update user set authentication_string=PASSWORD('new_password') where user='root';

You should see

“Query OK, 1 row affected, 1 warning (0.03 sec)

Rows matched: 1 Changed: 1 Warnings: 1”

  • To change the authentication plugin run

mysql> UPDATE user SET plugin='mysql_native_password';

You should see someething like

Query OK, 4 rows affected (0.00 sec)

Rows matched: 4 Changed: 4 Warnings: 0

  • Finally

mysql> FLUSH PRIVILEGES;

  • mysql> quit
  • stop and start the mysql server and test root login:

Stop mysql:

$ sudo service mysql stop

Start mysql (normal):

$ sudo service mysql start

Log in as root on localhost:

$ mysql -h localhost -u root -p 

That’s it for now! 

Sources:
Ask Ubuntu - software installation - mysql doesn't ask for root password when installing - Ask Ubuntu

Initial Server Setup with Ubuntu 18.04 | DigitalOcean

https://howtoubuntu.org/ ,How to Install LAMP on Ubuntu, April,2020